PyAvrOCD installation & configuration
Installation
Mac and Linux users should be aware of some idiosyncrasies.
Linux
On a Linux installation, users may need to add a few udev rules after having installed PyAvrOCD. Download https://pyavrocd.io/99-edbg-debuggers.rules, edit if you want, and copy to /etc/udev/rules.d/.
macOS
On a Mac, files downloaded through a browser or from an email are marked as potentially dangerous, and the system may not allow them to be executed. In this case, use the command xattr -d com.apple.quarantine FILE in a terminal window to remove the extended attribute com.apple.quarantine from the binary executable FILE. After that, you can start the executable without a hitch.
Arduino IDE 2
If you want to use PyAvrOCD as part of Arduino IDE 2, you do not need to install it explicitly. It is sufficient to install a debug-enabled Arduino package. Together with PyAvrOCD, you will also get the GDB client avr-gdb and the simulator (for some AVR chips) simavr.
If you want to use PyAvrOCD stand-alone or as part of another IDE, you need to install the PyAvrOCD package explicitly, as described below.‚
Downloading binaries
Go to the PyAvrOCD GitHub repo, and download the archive containing the binary for your architecture from the set of assets of the latest Releases. This archive includes the folder tools.
How to download the binaries
Click on the Latest button below Releases on the right side of the page.
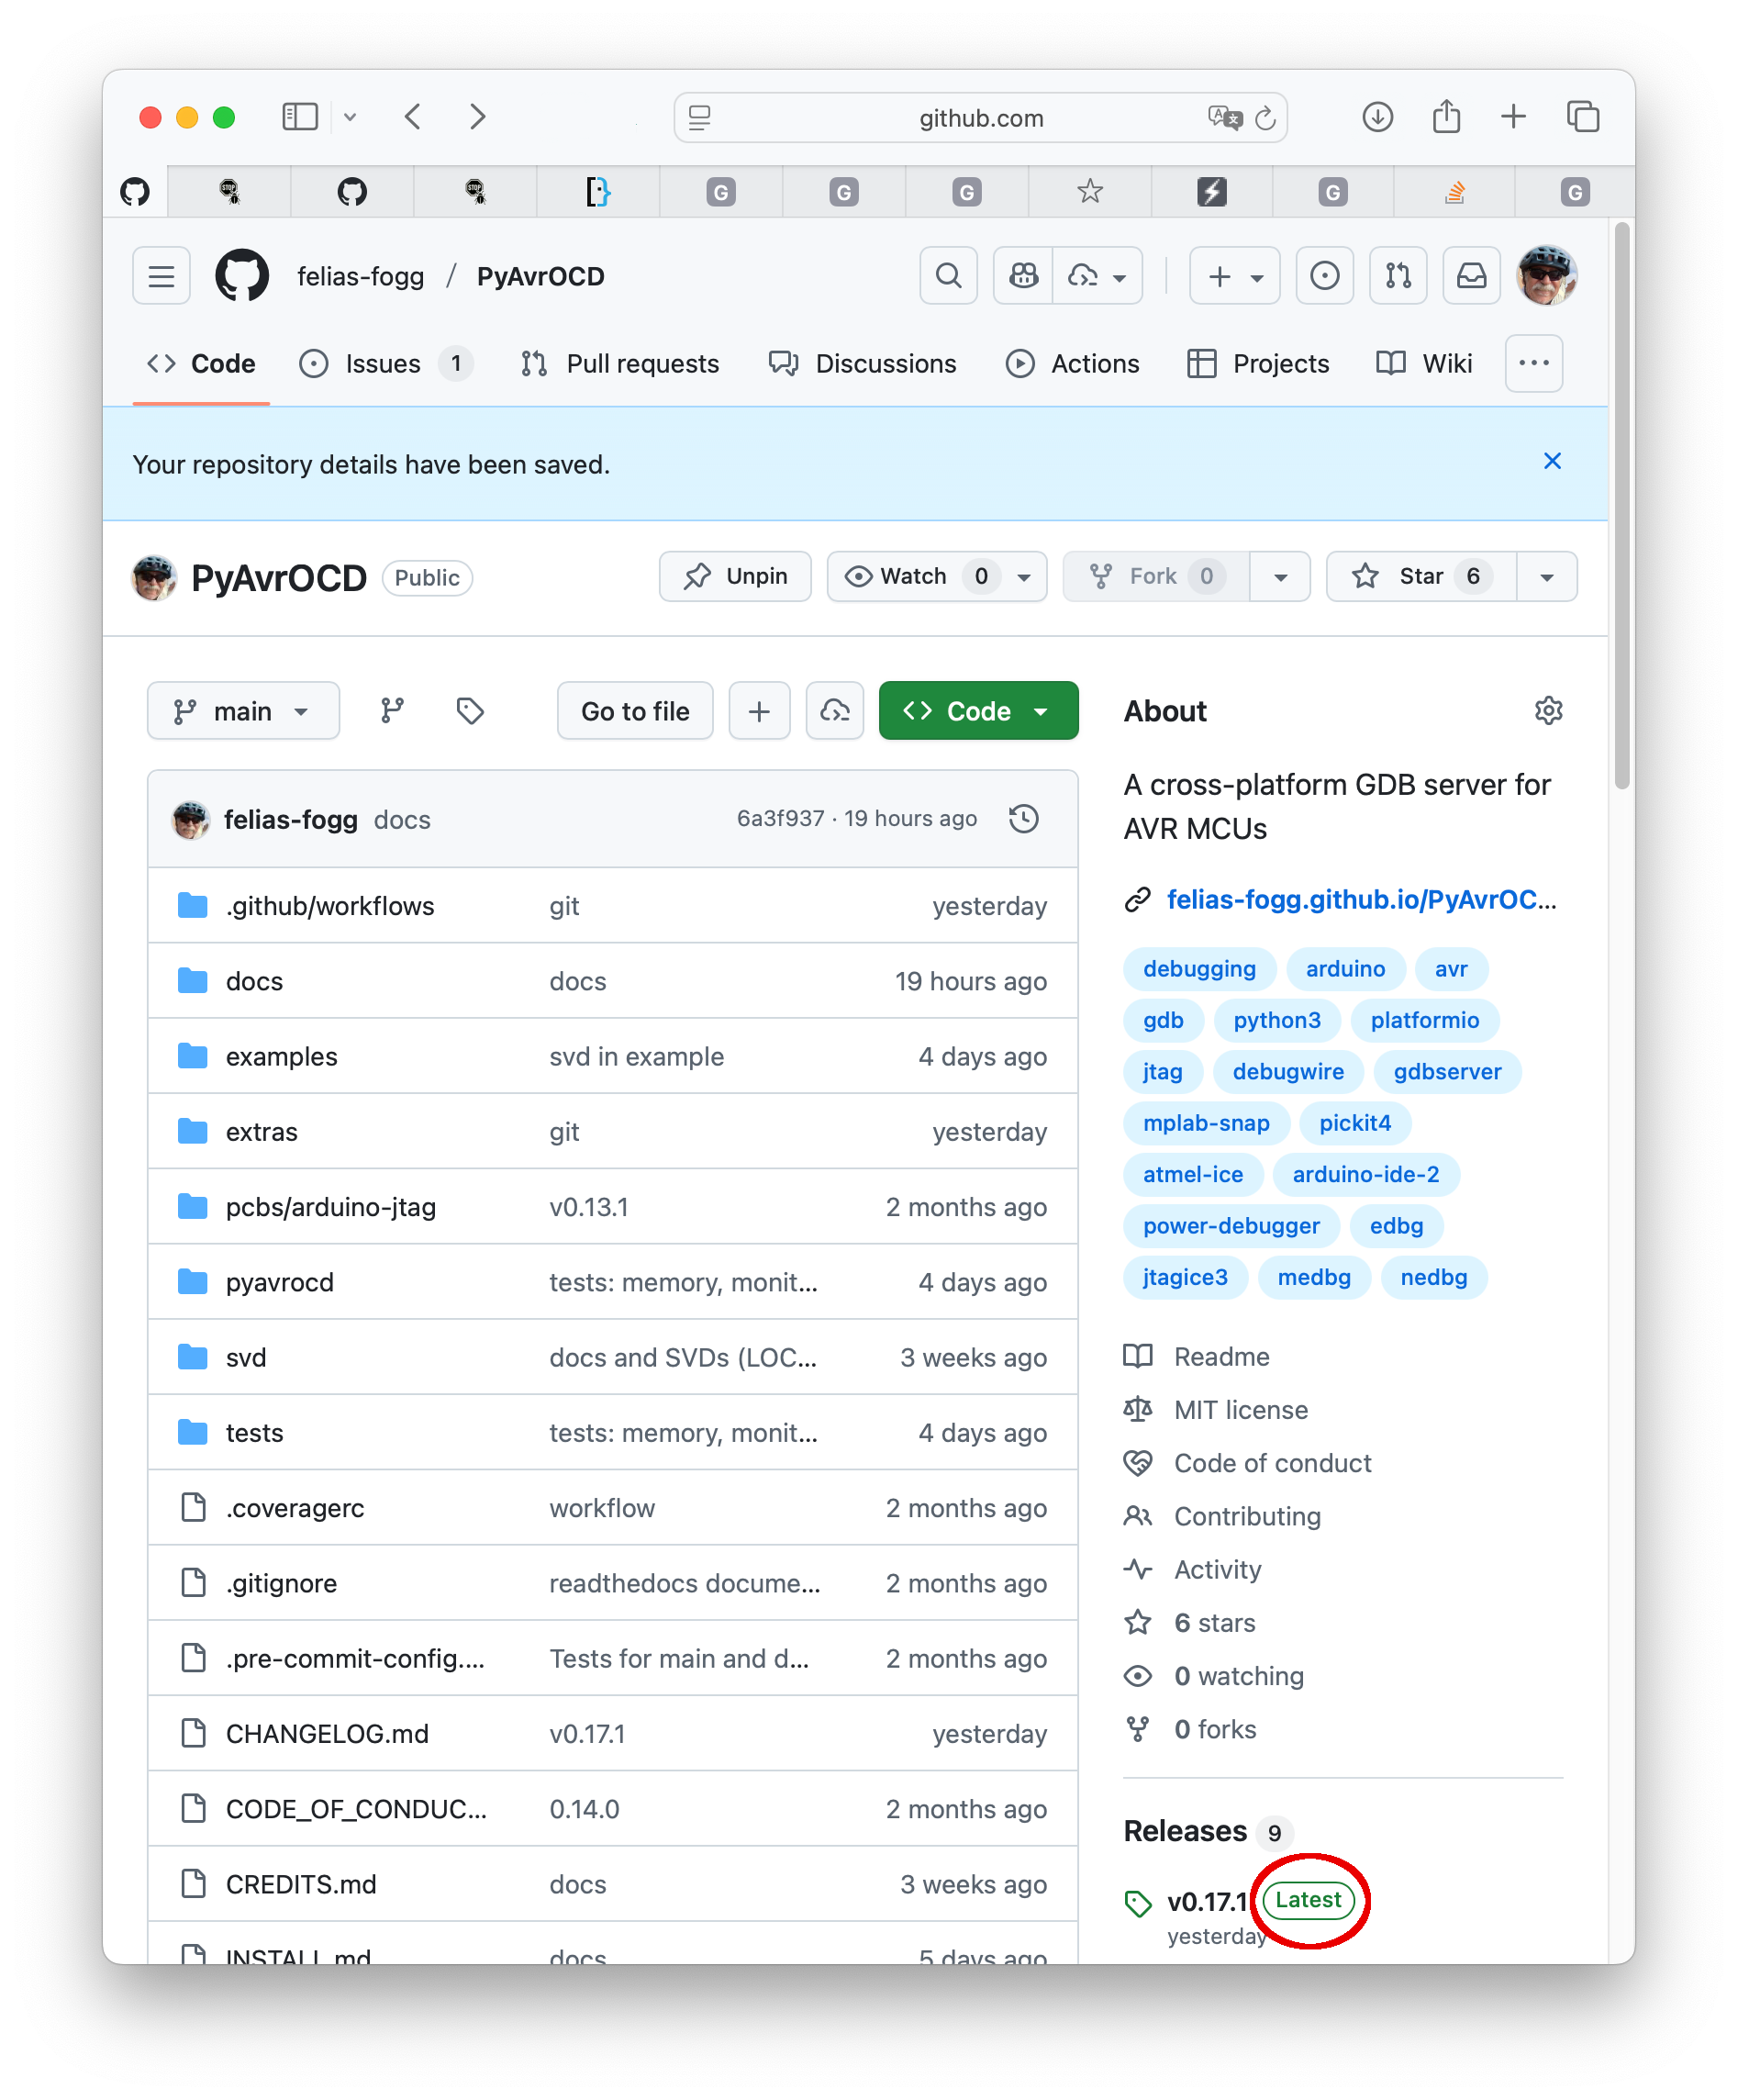
This will open the latest release page with all its assets.

Select the archive matching your architecture and download it.
After downloading the archive, extract the files (for Windows, I assume, you use the Windows PowerShell):
tar xvzf avrocd-tools-X.Y.Z-architecture.tar.gz
Store its content somewhere in a folder and include this folder in your PATH variable.
How to install the binaries
Once you have downloaded the archive and uncompressed it, you need to move the files from the tools folder to its destination (e.g., ~/.local/bin). For this purpose, first move into the tools folder of the uncompressed archive and:
mkdir ~/.local
mkdir ~/.local/bin
rm -rf ~/.local/bin/pyavrocd-util
mv pyavrocd* ~/.local/bin/
mv avr-gdb*  ~/.local/bin/
mv bin/* ~/.local/bin/
mv lib ~/.local/
Now, you only need to add ~/.local/bin/ to your PATH
It might happen that the binaries are not compatible with your operating system. In this case, use one of the methods below.
PyPI
I assume you already installed a recent Python version (>=3.10). Then PyPI, with the help of pip or pipx, will bring PyAvrOCD to your computer.
How to install PyAvrOCD with pip or pipx
It is possible to install PyAvrOCD using pip. However, it is recommended to use pipx instead. Pipx installs packages in a way such that they are entirely isolated from the rest of your Python installation and can be invoked as an ordinary binary executable. So, if you haven't done so already, install pipx following the instructions on the pipx website. Then proceed as follows.
pipx install pyavrocd
pipx ensurepath
After restarting the shell, you should be able to start the GDB server. The binary is stored under ~/.local/bin/.
Note that the folder with SVD files is not part of the PyPI installation. If you want to use SVD files, they have to be downloaded separately from the release page of the GitHub repo. The release asset is called svd.tar.gz.
GitHub
Alternatively, you can download or clone the GitHub repository. Additionally, you need to install a Python package manager, for instance, Poetry, which can be used to install and run the package.
How to use Poetry
After having cloned the repo, install Poetry:
pipx install poetry
After having moved into the PyAvrOCD project folder, you can start executing the script inside the downloaded folder as follows:
poetry install
poetry run pyavrocd ...
Furthermore, you can create a binary standalone package as follows:
poetry run pyinstaller pyavrocd.spec
As a result, you find an executable pyavrocd (or pyavrocd.exe) in the directory dist/pyavrocd/ together with the folder pyavrocd-util. You can copy those two to a place in your PATH.
Configuration
It is not necessary to set up any configuration file before using PyAvrOCD.
However, sometimes, it may be convenient to store some options in a file so that you do not have to type them every time you invoke PyAvrOCD. For this purpose, the @ notation is very helpful. If you place the string @file.ext on the command line, then arguments are read from file.ext and spliced into the command line. These arguments are read line by line.
Example
Let us assume, file.ext contains the following lines:
--manage
eesave
--prog=3000
--to
atmelice
--veri=e
When you now invoke PyAvrOCD with pyavrocd -d attiny13 -t dwlink @file.ext,, then this is expanded into
pyavrocd -d attiny13 -t dwlink --manage eesave --prog=3000 --to atmelice --veri=e
With the usual abbreviation rules, the fact that the equal sign can simply be substituted by space, and the rule that later arguments override earlier ones, this is equivalent to
pyavrocd --device attiny13 --manage eesave --prog-clock 3000 --tool atmelice --verify enable
Note that implicitly @pyavrocd.options is added to the end of the command line. This means that even if you cannot change the command line that invokes PyAvrOCD, because, e.g., PyAvrOCD is invoked by an IDE, you still can specify arguments that have precedence by using the configuration file pyavrocd.options.